Make your own panda costume, with these easy to follow instructions!
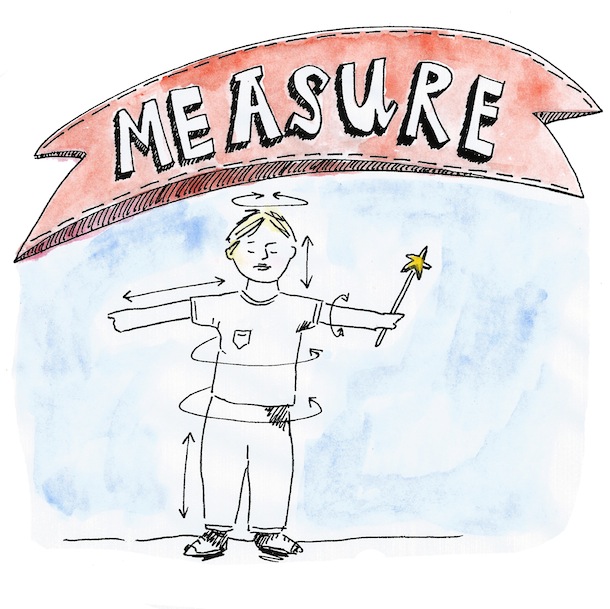
Step 1: MEASURE YOUR CHILD
- Circumference of head
- From between the eyebrows to back and bottom of neck
- Shoulder to shoulder
- Shoulder to wrist (both arms)
- Around the largest part of the arm (both arms)
- Base of neck to the crotch
- Around the chest (at the nipples)
- Around the belly (at the belly button)
- Around the hips (at the center of the bottom)
- Inseam (from the crotch to the ground)
- Around the thigh at the widest part (both legs)
With each measurement, add approximately 10″ (for the seams, the thickness of the fabric you will use, and extra breathing room). When in doubt, give yourself extra fabric for the suit—you can always take it in and make it smaller.
Step 2: BUY YOUR FABRIC
Estimate the amount of fabric you’ll need based the total of your final measurements. You will need the same amount of black and white fabric. Tell the staff at your local fabric store that you are looking “sherpa craft fur” or something similar to it. You can choose a black or white invisible zipper, just make sure it is a length that fits the torso of your child, from the crotch to the base of the neck. Don’t forget to buy any of the other supplies you will need when getting your fabric.
Step 3: START WITH THE HEAD
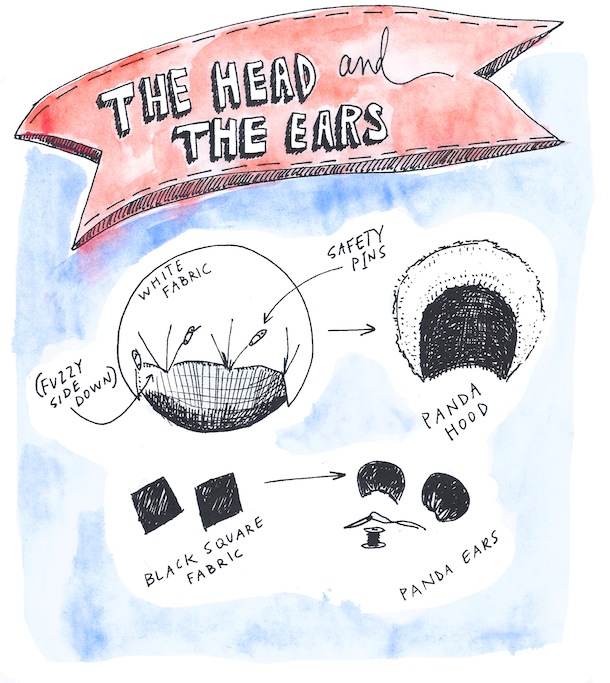
This is where you get a little creative! In order to make the panda head round and like a hood, use a ball that is close to the size of your child’s head (volleyball, soccer ball). From the white fabric, cut a square piece that fits all the way around the ball, with a bit extra. Wrap the fabric around the ball loosely with the fuzzy side facing the ball. Next, use safety pins to pin back the four corners of the fabric square in a circular way. This will be the opening for the face of the costume. Work slowly around the whole ball, loosely pinching the fabric and pinning it so that after you sew all the pinched spots, you will turn the hood right side in and the fuzzy side will be a flush circular shape. After sewing all the seams and pinches, choose the spot that will connect to the rest of the costume at the bottom of the face opening and cut a slit from there that is half the measurement of the circumference of your child’s head.
Step 4: THE EARS
To make the ears, just eyeball the size you would like them to be and cut two squares from the black fabric. (Always over-estimate when cutting into the fabric.) Here again you can just sort of ball them up until they appear to look like an appropriate panda ear and freestyle sew it together. Next, join the ears up with the white hooded head you made. Safety pin the ears on before sewing so you can really see where they are going to sit on the hood.
Step 5: THE BODY
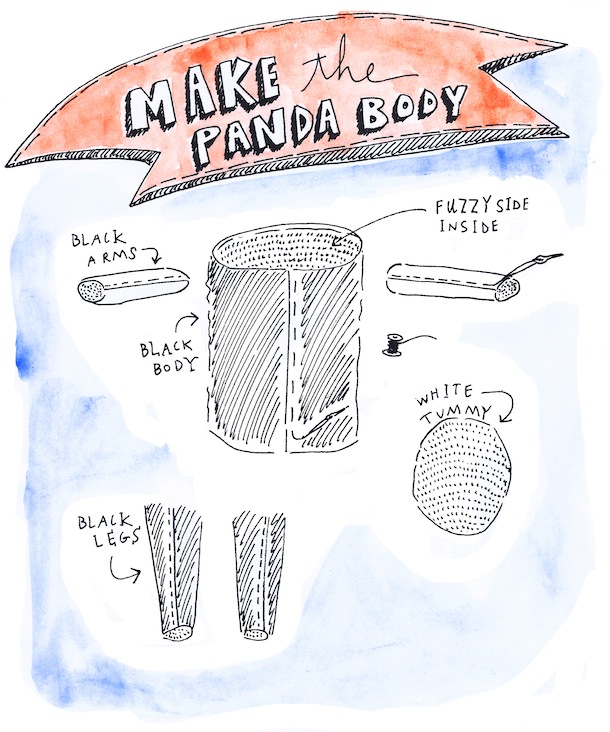
Take a big cut out of the black fabric that is at least longer than the largest measurement you took from your child’s torso. Keeping the furry side facing inward, form it into a tube, then sew the seam where the two edges meet to form the tube. Do the same for the two arms. Remember, you want your panda to be able to move, so do everything with a little extra room. Next, take the two arms and place them on either sides of the upper torso area of the large tube. Pin them in place while you trace around the arms with your chalk to make the arm holes. Cut the holes out. Sew the arms on using your black thread. To finish the arms, you can fold the wrist seam in and sew it if you want a cleaner look.
Between the fur of the fabric and the fact that your child may only wear or fit into this costume for one season, nothing needs to be perfect! So don’t stress about mistakes and imperfections on your side.
Next, cut an oval shape from your white fabric, place it onto the front of the black torso you just made, and sew it on. Then find the center of the top of the chest opening, take your zipper, and cut straight down the center of the torso the same length as your zipper. Sew it in!
Step 6: THE PANDA BOOTY
Follow the same process for the legs as you did for the arms, but leave even more room in the legs than you think you need to (wider at the thighs and tapered at the ankles), and make them longer, too. Once you have your two legs, place them side-by-side. Now is when you kind of need to make it up—you are essentially making pants. After you figure that one out, sew the bottom onto to the upper torso.
Step 7: PUT IT ALL TOGETHER
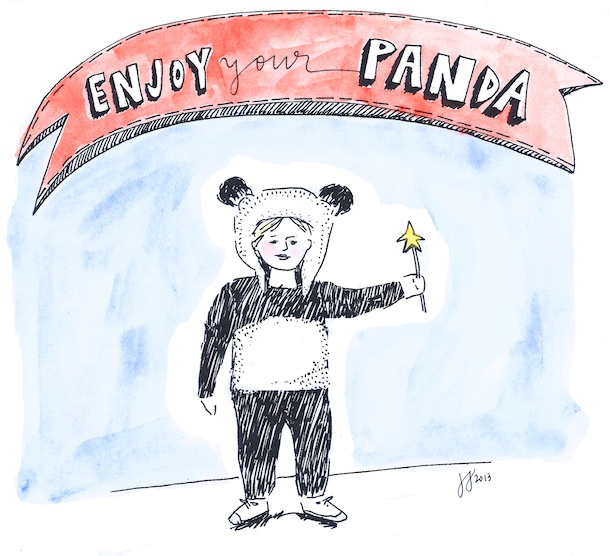
Last but not least, don’t forget to sew the HEAD on! Then unzip the suit and let your child try it on. Presto! Panda time!
And do a little dance!
Jackie Jones is a graphic designer and illustrator who has had the pleasure to create projects with clients all over the world. She currently lives in the fruit valley of Washington with her husband Andy, and is painting up a storm for her first children’s book.


